Build Your World
Everything you ever needed to know about custom Lingo maps
A BriefOverview
Development Environment
Your First Map
The Next Steps
Any Questions
Overview
I'm so glad you're interested in making custom content! Lingo wouldn't be what it is today without tons of suggestions and content from our community, and I remain beyond humbled that so many people have chosen to engage and invest in this space.
I generally recommend you've achieved at least The Master achievement before attempting to start building your own content. This ensures you have a good handle on the current design elements and choices, which is pretty important if you want to build your own. Not to say you can't throw all that out the window - that's one of the best parts! But knowing what exists is pretty important.
You should also make sure you have tried to boot up at least one existing custom map via the settings, using the instructions on the Custom Maps page. This is a practical matter - it's how people, including you (at first), will be testing and playing your map, so you should be comfortable with the process.
Development Environment
You will need two pieces of free software to create maps for Lingo. The first is the Godot engine (link) and the second is the repository distributed via Github (link).
Important Note: I will need to add you to the repository before the repository link will work. Please send me your Github username.
Godot
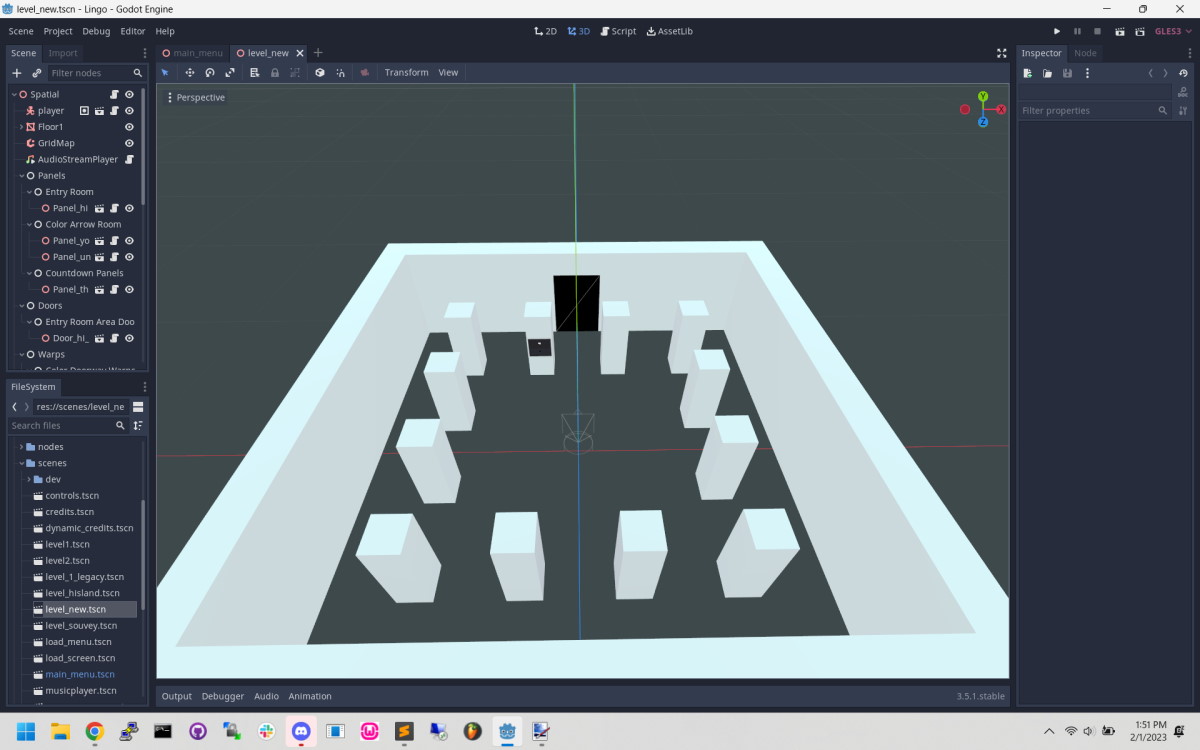
Godot is the free video game engine that's used to create and run Lingo. There are many ways to learn to interact with it, and some general purpose getting started tutorials may do well towards acquainting you with the interface. A quick bit of anatomy: The four sections you're concerned with are the Scene Viewer (middle), File System (bottom left), Scene Tree (top left), and Node Inspector (right).
Github
I recommend Github Desktop (link) for interacting with Git unless you are already a software professional well-versed in the platform and happen to prefer the CLI. I require that collaborators create new branches and send code updates via Pull Requests, not via committing directly to main.
It's worth noting that you don't need to send any code through Github - but if you choose to, please use the Pull Request function to do so. If you just want to make a map using existing components, you are fine to restrict your interaction with Github to "fetch" and "pull".
If you have any questions, please feel free to ask.
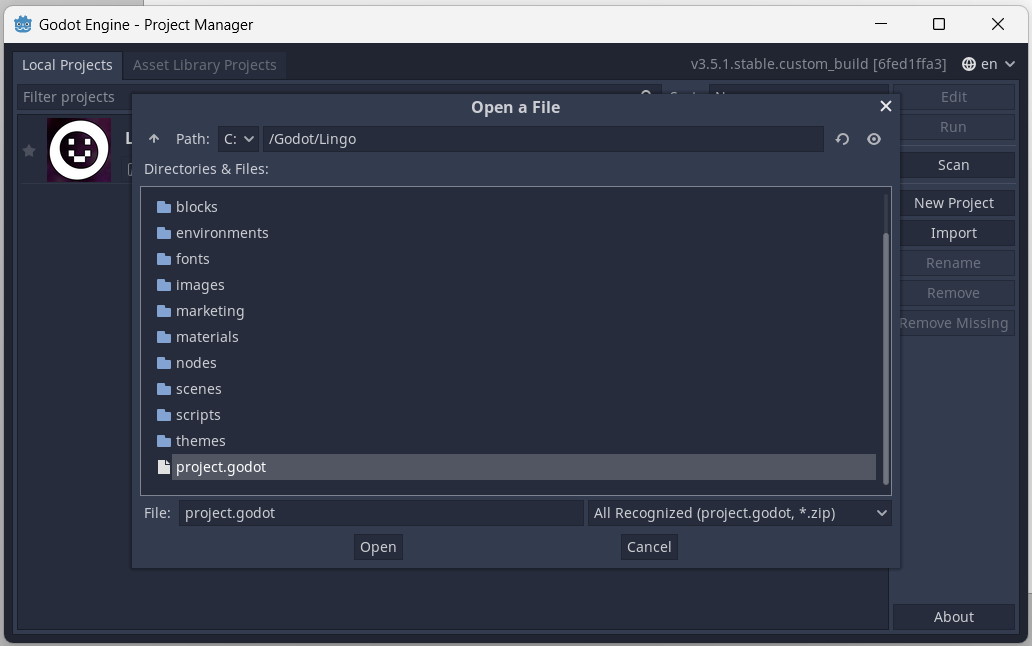
You'll need to clone the repository from Git somewhere - it doesn't matter where, but I put mine in C:\Godot\Lingo\ which makes it very easy for me to find. Once you have it cloned, you'll want to point your Godot editor to it. You can also change the steamapp_id.txt file ID to 1814170, which will make your tests in the editor reflect that you're playing Lingo and not Spacewar, and should stop you from crashing if you connect to any of the Steam functionality.

Your First Map

The first step you should take is to duplicate the "level_new.tscn" in the File System (bottom left) and name it whatever you want to call your map - let's say "level_smiley.tscn". Open that file. You should then select the Spatial element in the Scene Tree (top left) and change the Level Path in the Node Inspector (top right) to the same - in our example, "level_new" to "level_smiley".
This is actually enough to test it, so let's do that. Right click on your level in the File System and select "Show In File Manager." This will bring up your computer's file manager. Copy your map, then paste it into the maps directory as if it were any other custom map. Launch the game, select it in Settings, and start a new game.
Next Steps
Now for the interesting part! The starter level I provided has a copy of each major component type so you can integrate and duplicate them to create your world. The components are also available by dragging from the nodes folder in the File System, but if I'm honest, I just duplicate everything (except paintings).
Navigating in Editor
To move around in the 3D space within the editor, hold your right mouse button and use the WASD keys to move. Shift will speed you up. The mouse wheel when you ARE holding right mouse button will change your default move speed, and when you ARE NOT holding RMB will change your zoom.
Gridmap
This is where I spend 50% of my time. The gridmap is essentially a Minecraft world editor. You pick a block and then paint with it by left clicking. The gridmap can do a lot but some of the major functions are:
- Escape: deselect a block
- Left click (or click and drag): draw the block
- Right click (or click and drag): erase
- Control + mouse wheel: change level
- Right click hold + mouse wheel: change movement speed
- Shift + click + drag: Select a region
- Control + f: flood fill a selection with the selected block
- Copy and paste works but is annoying.
Panels
How to make your own dad jokes! The panels each need a "text" and "answer" in the Node Inspector (top right) and the other options can largely remain as they are, unless you are doing something specific.
All nodes move around the same way, click and drag, while holding control to snap to grid. You can also rotate by grabbing the curved line and control+click+drag.
Panels should typically be offset 0.01 away from the gridmap tile block to make them look right. If aligning to a cube, one of the XZ values will end in .5 and the other will end in .01 or.99. Don't worry too much if that doesn't make sense, it'll be easier when you try it.
The panel structure needs to stay essentially the same for the save and load functions to work. I'm not actually sure the game won't crash if you don't have Panels/{PanelGroup}/{Panel}.
There are several variations of panel, which are accessible by attaching other scripts to the panel instance (Node Inspector, bottom right). You probably only want PanelMain, and maybe PanelDestroy. PanelDestroy is the same as PanelMain except that it shrinks to the size of a butterfly fart and translates 100 blocks into the ground when it's solved. Handy.
Doors
Doors! Or in this case, black boxes that sometimes drop into the floor. Move them around same as how you do for panels (and every other node). There are two varieties of doors, one that is black and the other that needs a color specified. This is so dumb that now that I'm having to write it for the entire internet to see, I might change it.
Doors attach themselves to an array of panels (set within the door). When all those panels are solved, they open. That's... pretty much it.
False Walls
Okay, so, I named this badly. I'll just get that out of the way now. These are also called hidden doors, but they're the hidden doors in the Decorations group instead of the Doors group. You can make them any color you like but most players will just make them gray with the settings cheat, so stay aware of that. Beyond that, you've seen what these do; they look like walls but you can walk through them. I recommend offsetting from a real wall, or otherwise indicating they're there, unless you want people to get mad at you.
Warps
How to build your own hell maze! Warps have an enter and an exit. They should be named:
- [same_name]_enter (has the teleport script attached), and
- [same_name]_exit
Be careful not to move the collision boxes instead of the warps. I've done that and they will not work right.
The script here expects a rotate variable, and the only options are 0, 90, 180, and 270. If you want to be facing the same direction on out as in, it's 0. Facing backwards, 180. Right turn (from in to out) is 270 and left turn (in to out) is 90. You'll also definitelywant to test these.
Countdown Panels
Track progress! The default script takes an array like doors, there's also an Auto version that will accept a PanelGroup and automatically attribute everything in that group to that Countdown Panel. You also need to set a replace_with panel - this is the panel that gets moved into the Countdown Panel's spot (what's revealed when the player hits 0 to solve).
Paintings
Saved the most complicated for last. There are four kinds of paintings:
1. Paintings that hang on a wall.
2. Paintings that hang on a wall and move you somewhere else. This requires attaching the painting script and pointing it to an exit, like a warp exit, and selecting rotation, like a teleport script.
3. Paintings that hang on a wall, move you, and move themselves when you solve a panel. These require the painting_eye script, all of the above values, plus the x and z value you want to move the painting into. The y and painting rotation will stay the same.
4. Paintings that hang on a wall, move you, and replace (and destroy) a different painting when you solve a panel. These require the painting_scenery script, and work pretty much the same as above, and as you might expect.
Okay I think that's each of the major components! If I've missed anything please let me know or ask questions, and I'll try to get it added for next time. Once again thanks so much for your interest and I look forward to seeing what you create!
Any Questions
We have a great community of creators on Discord that's always happy to help people get started. Send me a message letting me know you'd like to try your hand at making maps, and I'll add the Map Maker role so you can access our creator channels.